Installation Guide#
⚠️ Please read carrefully this documentation. Depending on you make a fresh installation or update an existing version, install version 3 or version 4, repository or packages names may vary.
Current supported versions of TheHive are: - Version 3.5.0 and later that supports only Elasticsearch 7.x. - Version 4.0 and later.
Instruction to install TheHive supporting Elasticsearch 6.x (EoL in Nov. 2020) are still detailled in this documentation.
Before installing TheHive, you need to choose the installation option which suits your environment as described below. Once you have a chosen an option and installed the software, read the Configuration Guide. We also advise reading the Administration Guide.
Table of Contents#
Installation Options#
TheHive is available as:
- an RPM package
- a DEB package
- a Docker image
- a binary package
In addition, TheHive can be also be built from the source code.
RPM#
RPM packages are published on a our RPM repository. All packages are signed using our GPG key 562CBC1C. Its fingerprint is:
0CD5 AC59 DE5C 5A8E 0EE1 3849 3D99 BB18 562C BC1C
Run the following command to import the GPG key :
sudo rpm --import https://raw.githubusercontent.com/TheHive-Project/TheHive/master/PGP-PUBLIC-KEY
Release versions#
The release repository contains packages for TheHive 3.5.0+ and TheHive 4.0.0+
Setup your system to connect the RPM repository. Create and edit the file /etc/yum.repos.d/thehive-project.repo:
[thehive-project]
enabled=1
priority=1
name=TheHive-Project RPM repository
baseurl=https://rpm.thehive-project.org/release/noarch
gpgcheck=1
Then you will able to install TheHive 3.5.0+ the package using yum:
yum install thehive
or install TheHive 4.0.0+:
yum install thehive4
Stable versions (or legacy versions)#
The Stable repository is a legacy repository and contains packages for TheHive 3.4.4 that does not support Elasticsearch version 7.x**, but version 6.x.
Setup your system to connect the RPM repository. Create and edit the file /etc/yum.repos.d/thehive-project.repo:
[thehive-project]
enabled=1
priority=1
name=TheHive-Project RPM repository
baseurl=https://rpm.thehive-project.org/stable/noarch
gpgcheck=1
Then you will able to install TheHive 3.4.4 package using yum:
yum install thehive
Following beta versions#
To follow beta versions of TheHive, use the following setup:
And setup your system to connect the RPM repository. Create and edit the file /etc/yum.repos.d/thehive-project.repo:
[thehive-project]
enabled=1
priority=1
name=TheHive-Project RPM repository
baseurl=https://rpm.thehive-project.org/beta/noarch
gpgcheck=1
Then you will able to install beta version of TheHive 3.x package using yum:
yum install thehive
or install beta version of TheHive 4.x:
yum install thehive4
⚠️ We do not recommend that configuration for production servers
Once the package is installed, proceed to the configuration using the Configuration Guide. For additional configuration options, please refer to the Administration Guide.
DEB#
Debian packages are published on a our DEB packages repository. All packages are signed using our GPG key 562CBC1C. Its fingerprint is:
0CD5 AC59 DE5C 5A8E 0EE1 3849 3D99 BB18 562C BC1C
Release versions#
The release repository contains packages for TheHive 3.5.0+ and TheHive 4.0.0+
Setup apt configuration with the release repository:
curl https://raw.githubusercontent.com/TheHive-Project/TheHive/master/PGP-PUBLIC-KEY | sudo apt-key add -
echo 'deb https://deb.thehive-project.org release main' | sudo tee -a /etc/apt/sources.list.d/thehive-project.list
sudo apt-get update
Then you will able to install TheHive 3.5.0+ the package using apt command:
apt install thehive
or install TheHive 4.0.0+:
apt install thehive4
Stable versions (or legacy versions)#
The main repository is a legacy repository and contains packages for TheHive 3.4.4 that does not support Elasticsearch version 7.x, but version 6.x.
Setup apt configuration with the main repository:
curl https://raw.githubusercontent.com/TheHive-Project/TheHive/master/PGP-PUBLIC-KEY | sudo apt-key add -
echo 'deb https://deb.thehive-project.org stable main' | sudo tee -a /etc/apt/sources.list.d/thehive-project.list
sudo apt-get update
Then you will able to install TheHive 3.4.4 package using apt command:
apt install thehive
Beta versions#
To follow beta versions of TheHive, use the following commands:
curl https://raw.githubusercontent.com/TheHive-Project/TheHive/master/PGP-PUBLIC-KEY | sudo apt-key add -
echo 'deb https://deb.thehive-project.org beta main' | sudo tee -a /etc/apt/sources.list.d/thehive-project.list
sudo apt-get update
sudo apt-get install thehive
⚠️ We do not recommend that configuration for production servers
Docker#
To use the Docker image, you must use Docker (courtesy of Captain Obvious).
TheHive requires Elasticsearch to run. You can use docker-compose to start them together in Docker or install and configure Elasticsearch manually.
Use Docker-compose#
Docker-compose can start multiple dockers and link them together.
The following docker-compose.yml file starts Elasticsearch and TheHive:
version: "2"
services:
  elasticsearch:
    image: elasticsearch:7.9.1
    environment:
      - http.host=0.0.0.0
      - discovery.type=single-node
    ulimits:
      nofile:
        soft: 65536
        hard: 65536
  cortex:
    image: thehiveproject/cortex:3.1.0-1
    depends_on:
      - elasticsearch
    ports:
      - "0.0.0.0:9001:9001"
  thehive:
    image: thehiveproject/thehive:3.5.0-1
    depends_on:
      - elasticsearch
      - cortex
    ports:
      - "0.0.0.0:9000:9000"
    command: --cortex-port 9001
Put this file in an empty folder and run docker-compose up. TheHive is exposed on 9000/tcp port and Cortex on 9001/tcp. These ports can be changed by modifying the docker-compose file.
You can specify a custom TheHive configuration file (application.conf) by adding the following lines in the thehive section of your docker-compose file:
volumes:
    - /path/to/application.conf:/etc/thehive/application.conf
To take effect, be sure that:
- '/path/to/application.conf' is readable for the user who runs the docker daemon (typically 644)
- you specified command: --no-config in your docker-compose.yml file
You should define where the data (i.e. the Elasticsearch database) will be located on your operating system by adding the following lines in the elasticsearch section of your docker-compose file:
volumes:
    - /path/to/data:/usr/share/elasticsearch/data
Running ElasticSearch in production mode requires a minimum vm.max_map_count of 262144. ElasticSearch documentation provides instructions on how to query and change this value.
If you want to make Cortex be available on TheHive, you must create an account on Cortex, define an API key for it and provide that key to TheHive container using parameter --cortex-key or environment TH_CORTEX_KEY.
Manual Installation of Elasticsearch#
Elasticsearch can be installed on the same server as TheHive or on a different one. You can then configure TheHive according to the documentation and run TheHive docker as follow:
docker run --volume /path/to/thehive/application.conf:/etc/thehive/application.conf thehiveproject/thehive:latest --no-config
You can add the --publish docker option to expose TheHive HTTP service.
Customize the Docker Image#
By default, the TheHive Docker image has minimal configuration:
- choose a random secret (play.http.secret.key)
- search for the Elasticsearch instance (host named elasticsearch) and add it to configuration
- search for a Cortex instance (host named cortex) and add it to configuration
This behavior can be disabled by adding --no-config to the Docker command line:
docker run thehiveproject/thehive:latest --no-config
Or by adding the line command: --no-config in the thehive section of
docker-compose file.
It is possible to start database migration at startup with the parameter --auto-migration.
If the initial administrator doesn't exist yet, you can request its creation with --create-admin followed by the user login and its password.
You can also create a normal user with --create-user followed by the user login and its roles and its password.
The image accepts more options. All options are available using environment variables.
For boolean variable, 1 means true and other value means false. For multivalued variables, values are separated by coma. This is possible only with --create-admin.
| Option | Env variable | Description |
|---|---|---|
--no-config |
TH_NO_CONFIG | Do not try to configure TheHive (add the secret and Elasticsearch) |
--no-config-secret |
TH_NO_CONFIG_SECRET | Do not add the random secret to the configuration |
--secret <secret> |
TH_SECRET | Cryptographic secret needed to secure sessions |
--show-secret |
TH_SHOW_SECRET | Show the generated secret |
--no-config-es |
TH_NO_CONFIG_ES | Do not add the Elasticsearch hosts to configuration |
--es-uri <uri> |
TH_CONFIG_ES | Use this string to configure elasticsearch hosts (format: http(s)://host:port,host:port(/prefix)?querystring) |
--es-hostname <host> |
TH_ES_HOSTNAME | Resolve this hostname to find Elasticsearch instances |
--no-config-cortex |
TH_NO_CONFIG_CORTEX | Do not add Cortex configuration |
--cortex-proto <proto> |
TH_CORTEX_PROTO | Define the protocol to connect to Cortex (default: http) |
--cortex-port <port> |
TH_CORTEX_PORT | Define the port to connect to Cortex (default: 9001) |
--cortex-url <url> |
TH_CORTEX_URL | Add the Cortex connection |
--cortex-hostname <host> |
TH_CORTEX_HOSTNAME | Resolve this hostname to find the Cortex instance |
--cortex-key <key> |
TH_CORTEX_KEY | Define Cortex key |
--auto-migration |
TH_AUTO_MIGRATION | Migrate the database, if needed |
--create-admin <user> <password |
TH_CREATE_ADMIN_LOGIN TH_CREATE_ADMIN_PASSWORD | Create the first admin user, if not exist yet |
--create-user <user> <role> <password> |
TH_CREATE_USER_LOGIN TH_CREATE_USER_ROLE TH_CREATE_USER_PASSWORD | Create a user, only in conjunction with admin creation |
Note: please remember that you must install and configure Elasticsearch.
What to Do Next?#
Once the Docker image is up and running, proceed to the configuration using the Configuration Guide. For additional configuration options, please refer to the Administration Guide.
Pre-release Versions#
If you would like to use pre-release, beta versions of our Docker images and help us find bugs to the benefit of the whole community, please use thehiveproject/thehive:version-RCx. For example thehiveproject/thehive:3.1.0-RC1.
Binary#
The following section contains the instructions to manually install TheHive using binaries on Ubuntu 20.04 LTS.
1. Minimal Ubuntu Installation#
Install a minimal Ubuntu 20.04 system with the following software:
- Java runtime environment 1.8+ (JRE)
- Elasticsearch 7.x
Make sure your system is up-to-date:
sudo apt-get update
sudo apt-get upgrade
2. Install a Java Virtual Machine#
You can install either Oracle Java or OpenJDK. The latter is recommended.
sudo apt-get install openjdk-11-jre-headless
3. Install Elasticsearch#
To install Elasticsearch, please read the Elasticsearch Installation section below.
4. Install TheHive#
Binary packages can be downloaded from Bintray. The latest version is called thehive-latest.zip.
Download and unzip the chosen binary package. TheHive files can be installed wherever you want on the filesystem. In this guide, we assume you have chosen to install them under /opt.
cd /opt
wget https://download.thehive-project.org/thehive-latest.zip
unzip thehive-latest.zip
ln -s thehive-x.x.x thehive
Note: if you would like to use pre-release, beta versions of and help us find bugs to the benefit of the whole community, please download https://download.thehive-project.org/thehive-version-RCx.zip. For example https://download.thehive-project.org/thehive-3.5.0-RC1-1.zip.
5. First start#
It is recommended to use a dedicated, non-privileged user account to start TheHive. If so, make sure that the chosen account can create log files in /opt/thehive/logs.
If you'd rather start the application as a service, use the following commands:
sudo addgroup thehive
sudo adduser --system thehive
sudo cp /opt/thehive/package/thehive.service /usr/lib/systemd/system
sudo chown -R thehive:thehive /opt/thehive
sudo chgrp thehive /etc/thehive/application.conf
sudo chmod 640 /etc/thehive/application.conf
sudo systemctl enable thehive
sudo service thehive start
The only required parameter in order to start TheHive is the key of the server (play.http.secret.key). This key is used
to authenticate cookies that contain data. If TheHive runs in cluster mode, all instances must share the same key.
You can generate the minimal configuration with the following commands (they assume that you have created a
dedicated user for TheHive, named thehive):
sudo mkdir /etc/thehive
(cat << _EOF_
# Secret key
# ~~~~~
# The secret key is used to secure cryptographics functions.
# If you deploy your application to several instances be sure to use the same key!
play.http.secret.key="$(cat /dev/urandom | tr -dc 'a-zA-Z0-9' | fold -w 64 | head -n 1)"
_EOF_
) | sudo tee -a /etc/thehive/application.conf
Now you can start TheHive. To do so, change your current directory to the TheHive installation directory (/opt/thehive in this guide), then execute:
bin/thehive -Dconfig.file=/etc/thehive/application.conf
Please note that the service may take some time to start. Once it is started, you may launch your browser and connect to http://YOUR_SERVER_ADDRESS:9000/.
Please note that the service may take some time to start.
The first time you connect you will have to create the database schema. Click "Migrate database" to create the DB schema.

Once done, you should be redirected to the page for creating the administrator's account.
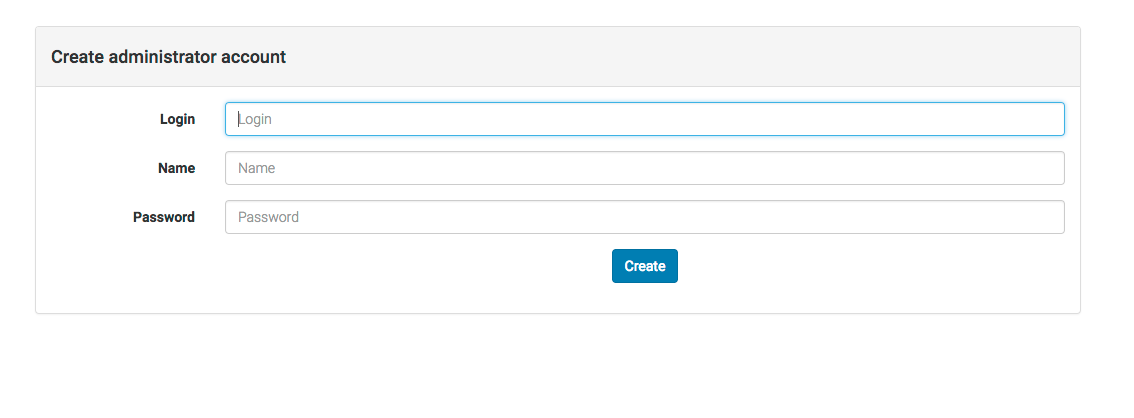
Once created, you should be redirected to the login page.
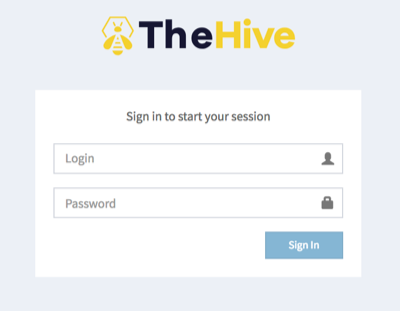
Warning: at this stage, if you missed the creation of the admin account, you will not be able to do it unless you delete TheHive's index from Elasticsearch. In the case you made a mistake, first find out what is the current index of TheHive by running the following command on a host where the Elasticsearch DB used by TheHive is located:
$ curl http://127.0.0.1:9200/_cat/indices?v
The indexes that TheHive uses always start withthe_hive_ following by a number. Let's assume that the output of the command is:
health status index       uuid                   pri rep docs.count docs.deleted store.size pri.store.size
yellow open   cortex_1    PC_pLFGBS5G2TNQYr4ajgw   5   1        609            6      2.1mb          2.1mb
yellow open   the_hive_13 ft7GGTfhTr-4lSzZw5r1DQ   5   1     180131            3     51.3mb         51.3mb
The index used by TheHive is the_hive_13. To delete it, run the following command:
$ curl -X DELETE http://127.0.0.1:9200/the_hive_13
Then reload the page or restart TheHive.
6. Update#
To update TheHive from binaries, just stop the service, download the latest package, rebuild the link /opt/thehive and
restart the service.
service thehive stop
cd /opt
wget https://download.thehive-project.org/thehive-latest.zip
unzip thehive-latest.zip
rm /opt/thehive && ln -s thehive-x.x.x thehive
chown -R thehive:thehive /opt/thehive /opt/thehive-x.x.x
service thehive start
7. Configuration#
To configure TheHive, read the Configuration Guide. For additional configuration options, please refer to the Administration Guide.
Build it Yourself#
The following section contains a step-by-step guide to build TheHive from its sources.
1. Pre-requisites#
The following software are required to download and build TheHive:
- Java Development Kit 11 (JDK)
- git: use the system package or download it
- Node.js with its package manager (NPM)
- Grunt: after installing Node.js, run
sudo npm install -g grunt-cli - Bower: after installing Node.js, run
sudo npm install -g bower - Elasticsearch 5.6
2. Build#
To install the requirements and build TheHive from sources, please follow the instructions below depending on your operating system.
2.1. CentOS/RHEL#
Packages
sudo yum -y install git bzip2
Installation of OpenJDK
sudo yum -y install java-11-openjdk-devel
Installation of Node.js
Install the EPEL repository. You should have the extras repository enabled, then:
sudo yum -y install epel-release
Then, you can install Node.js, Grunt, and Bower:
sudo yum -y install nodejs
sudo npm install -g grunt-cli bower
Installation of Elasticsearch
To install Elasticsearch, please read the Elasticsearch Installation section below.
2.2. Ubuntu#
Packages
sudo apt-get install git wget
Installation of Oracle JDK
sudo apt install openjdk-11-jdk-headless
Installation of Node.js, Grunt and Bower
sudo apt-get install curl
curl -sL https://deb.nodesource.com/setup_11.x | sudo -E bash -
sudo apt-get install -y nodejs
sudo npm install -g grunt-cli bower
Installation of Elasticsearch
To install Elasticsearch, please read the Elasticsearch Installation section below.
2.3. TheHive#
Download The Source
git clone https://github.com/TheHive-Project/TheHive.git
Build the Project
cd TheHive
./sbt clean stage
This operation may take some time to complete as it will download all dependencies then build the back-end.
This command cleans previous build files and creates an autonomous package in the target/universal/stage directory. This packages contains TheHive binaries with required libraries (/lib), configuration files (/conf) and startup scripts (/bin).
Binaries are built and stored in TheHive/target/universal/stage/. You can install them in /opt/thehive for example.
sudo cp -r TheHive/target/universal/stage /opt/thehive
Configure TheHive, read the Configuration Guide. For additional configuration options, please refer to the Administration Guide.
2.4 Configure and Start Elasticsearch#
Edit /etc/elasticsearch/elasticsearch.yml and add the following lines:
http.host: 127.0.0.1
discovery.type: single-node
cluster.name: hive
thread_pool.search.queue_size: 100000
Start the service:
service elasticsearch restart
3. First start#
Follow the first start section of the binary installation method above to start using TheHive.
4. Build the Front-end Only#
Building the back-end builds also the front-end, so you don't need to build it separately. This section is useful only for troubleshooting or for installing the front-end on a reverse proxy.
Go to the front-end directory:
cd TheHive/ui
Install Node.js libraries, which are required by this step, bower libraries (JavaScript libraries downloaded by the browser). Then build the front-end :
npm install
bower install
grunt build
This step generates static files (HTML, JavaScript and related resources) in the dist directory. They can be readily imported on a HTTP server.
Elasticsearch Installation#
If, for some reason, you need to install Elasticsearch, it can be installed using a system package or a Docker image. Version 5.X must be used. From version 6, Elasticsearch drops mapping type.
System Package#
Install the Elasticsearch package provided by Elastic
Debian, Ubuntu#
# PGP key installation
sudo apt-key adv --keyserver hkp://keyserver.ubuntu.com:80 --recv-key D88E42B4

# Alternative PGP key installation
# wget -qO - https://artifacts.elastic.co/GPG-KEY-elasticsearch | sudo apt-key add -

# Debian repository configuration
echo "deb https://artifacts.elastic.co/packages/7.x/apt stable main" | sudo tee -a /etc/apt/sources.list.d/elastic-7.x.list

# Install https support for apt
sudo apt install apt-transport-https

# Elasticsearch installation
sudo apt update && sudo apt install elasticsearch
The Debian package does not start up the service by default, to prevent the instance from accidentally joining a cluster, without being configured appropriately.
CentOS, RedHat, OpenSuSE#
# PGP key installation
sudo rpm --import https://artifacts.elastic.co/GPG-KEY-elasticsearch
Create the file elasticsearch.repo in /etc/yum.repos.d/ for RedHat and CentOS, or in /etc/zypp/repos.d/ for OpenSuSE distributions, and add the following lines:
[elasticsearch-5.x]
name=Elasticsearch repository for 7.x packages
baseurl=https://artifacts.elastic.co/packages/7.x/yum
gpgcheck=1
gpgkey=https://artifacts.elastic.co/GPG-KEY-elasticsearch
enabled=1
autorefresh=1
type=rpm-md
Then, you can use the following command:
# On CentOS and older Red Hat based distributions.
sudo yum install elasticsearch

# On Fedora and other newer Red Hat distributions.
sudo dnf install elasticsearch

# On OpenSUSE based distributions.
sudo zypper install elasticsearch
If you prefer using Elasticsearch inside a docker, see Elasticsearch inside a Docker.
Configuration#
It is highly recommended to avoid exposing this service to an untrusted zone.
If Elasticsearch and TheHive run on the same host (and not in a docker), edit /etc/elasticsearch/elasticsearch.yml and
set network.host parameter with 127.0.0.1. TheHive use dynamic scripts to make partial updates. Hence, they must be activated using script.inline: true.
The cluster name must also be set (hive for example). Threadpool queue size must be set with a high value (100000). The default size will get the queue easily overloaded.
Edit /etc/elasticsearch/elasticsearch.yml and add the following lines:
http.host: 127.0.0.1
cluster.name: hive
thread_pool.search.queue_size: 100000
Start the Service#
Now that Elasticsearch is configured, start it as a service and check whether it's running:
sudo systemctl enable elasticsearch.service
sudo systemctl start elasticsearch.service
sudo systemctl status elasticsearch.service
The status should be active (running). If it's not running, you can check for the reason in the logs:
sudo journalctl -u elasticsearch.service
Note that by default, the database is stored in /var/lib/elasticsearch and the logs in /var/log/elasticsearch
Elasticsearch inside a Docker#
You can also start Elasticsearch inside a docker. Use the following command and do not forget to specify the absolute path for persistent data on your host :
docker run \
  --name elasticsearch \
  --hostname elasticsearch \
  --rm \
  --publish 127.0.0.1:9200:9200 \
      --volume ***DATA_DIR***:/usr/share/elasticsearch/data \
    -e "http.host=0.0.0.0" \
    -e "discovery.type=single-node" \
    -e "xpack.security.enabled=false" \
    -e "cluster.name=hive" \
  -e "script.inline=true" \
  -e "thread_pool.index.queue_size=100000" \
  -e "thread_pool.search.queue_size=100000" \
  -e "thread_pool.bulk.queue_size=100000" \
    docker.elastic.co/elasticsearch/elasticsearch:7.9.1